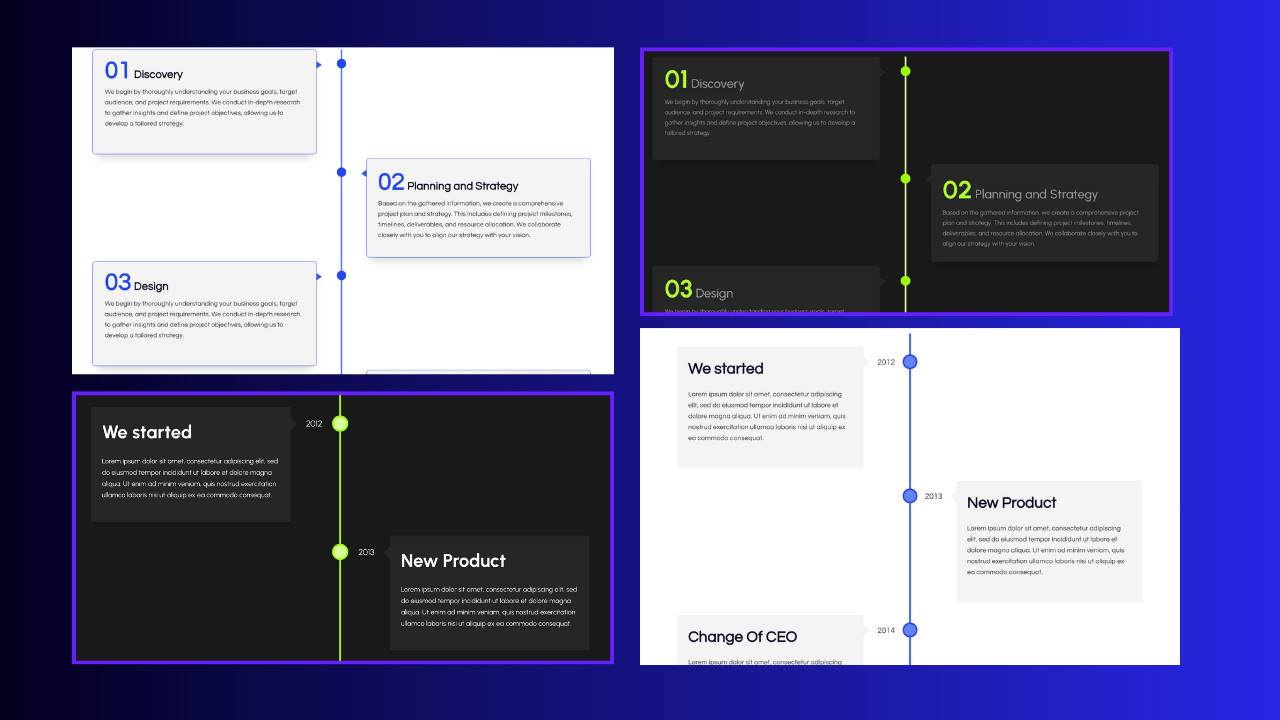
This was one of my most wished features of Kadence to have some type of timeline block but since they did not want to add it, I tried to create it with CSS.
It’s perfect for almost all use cases as the design is very flexible, you can add anything inside the timeline container, whether its simple text and images or any dynamic content.
Things to note here is, that there are 2 types of timeline Blocks I have created and both have different CSS and classes so make sure you do not mess it.
Timeline Block Style 1
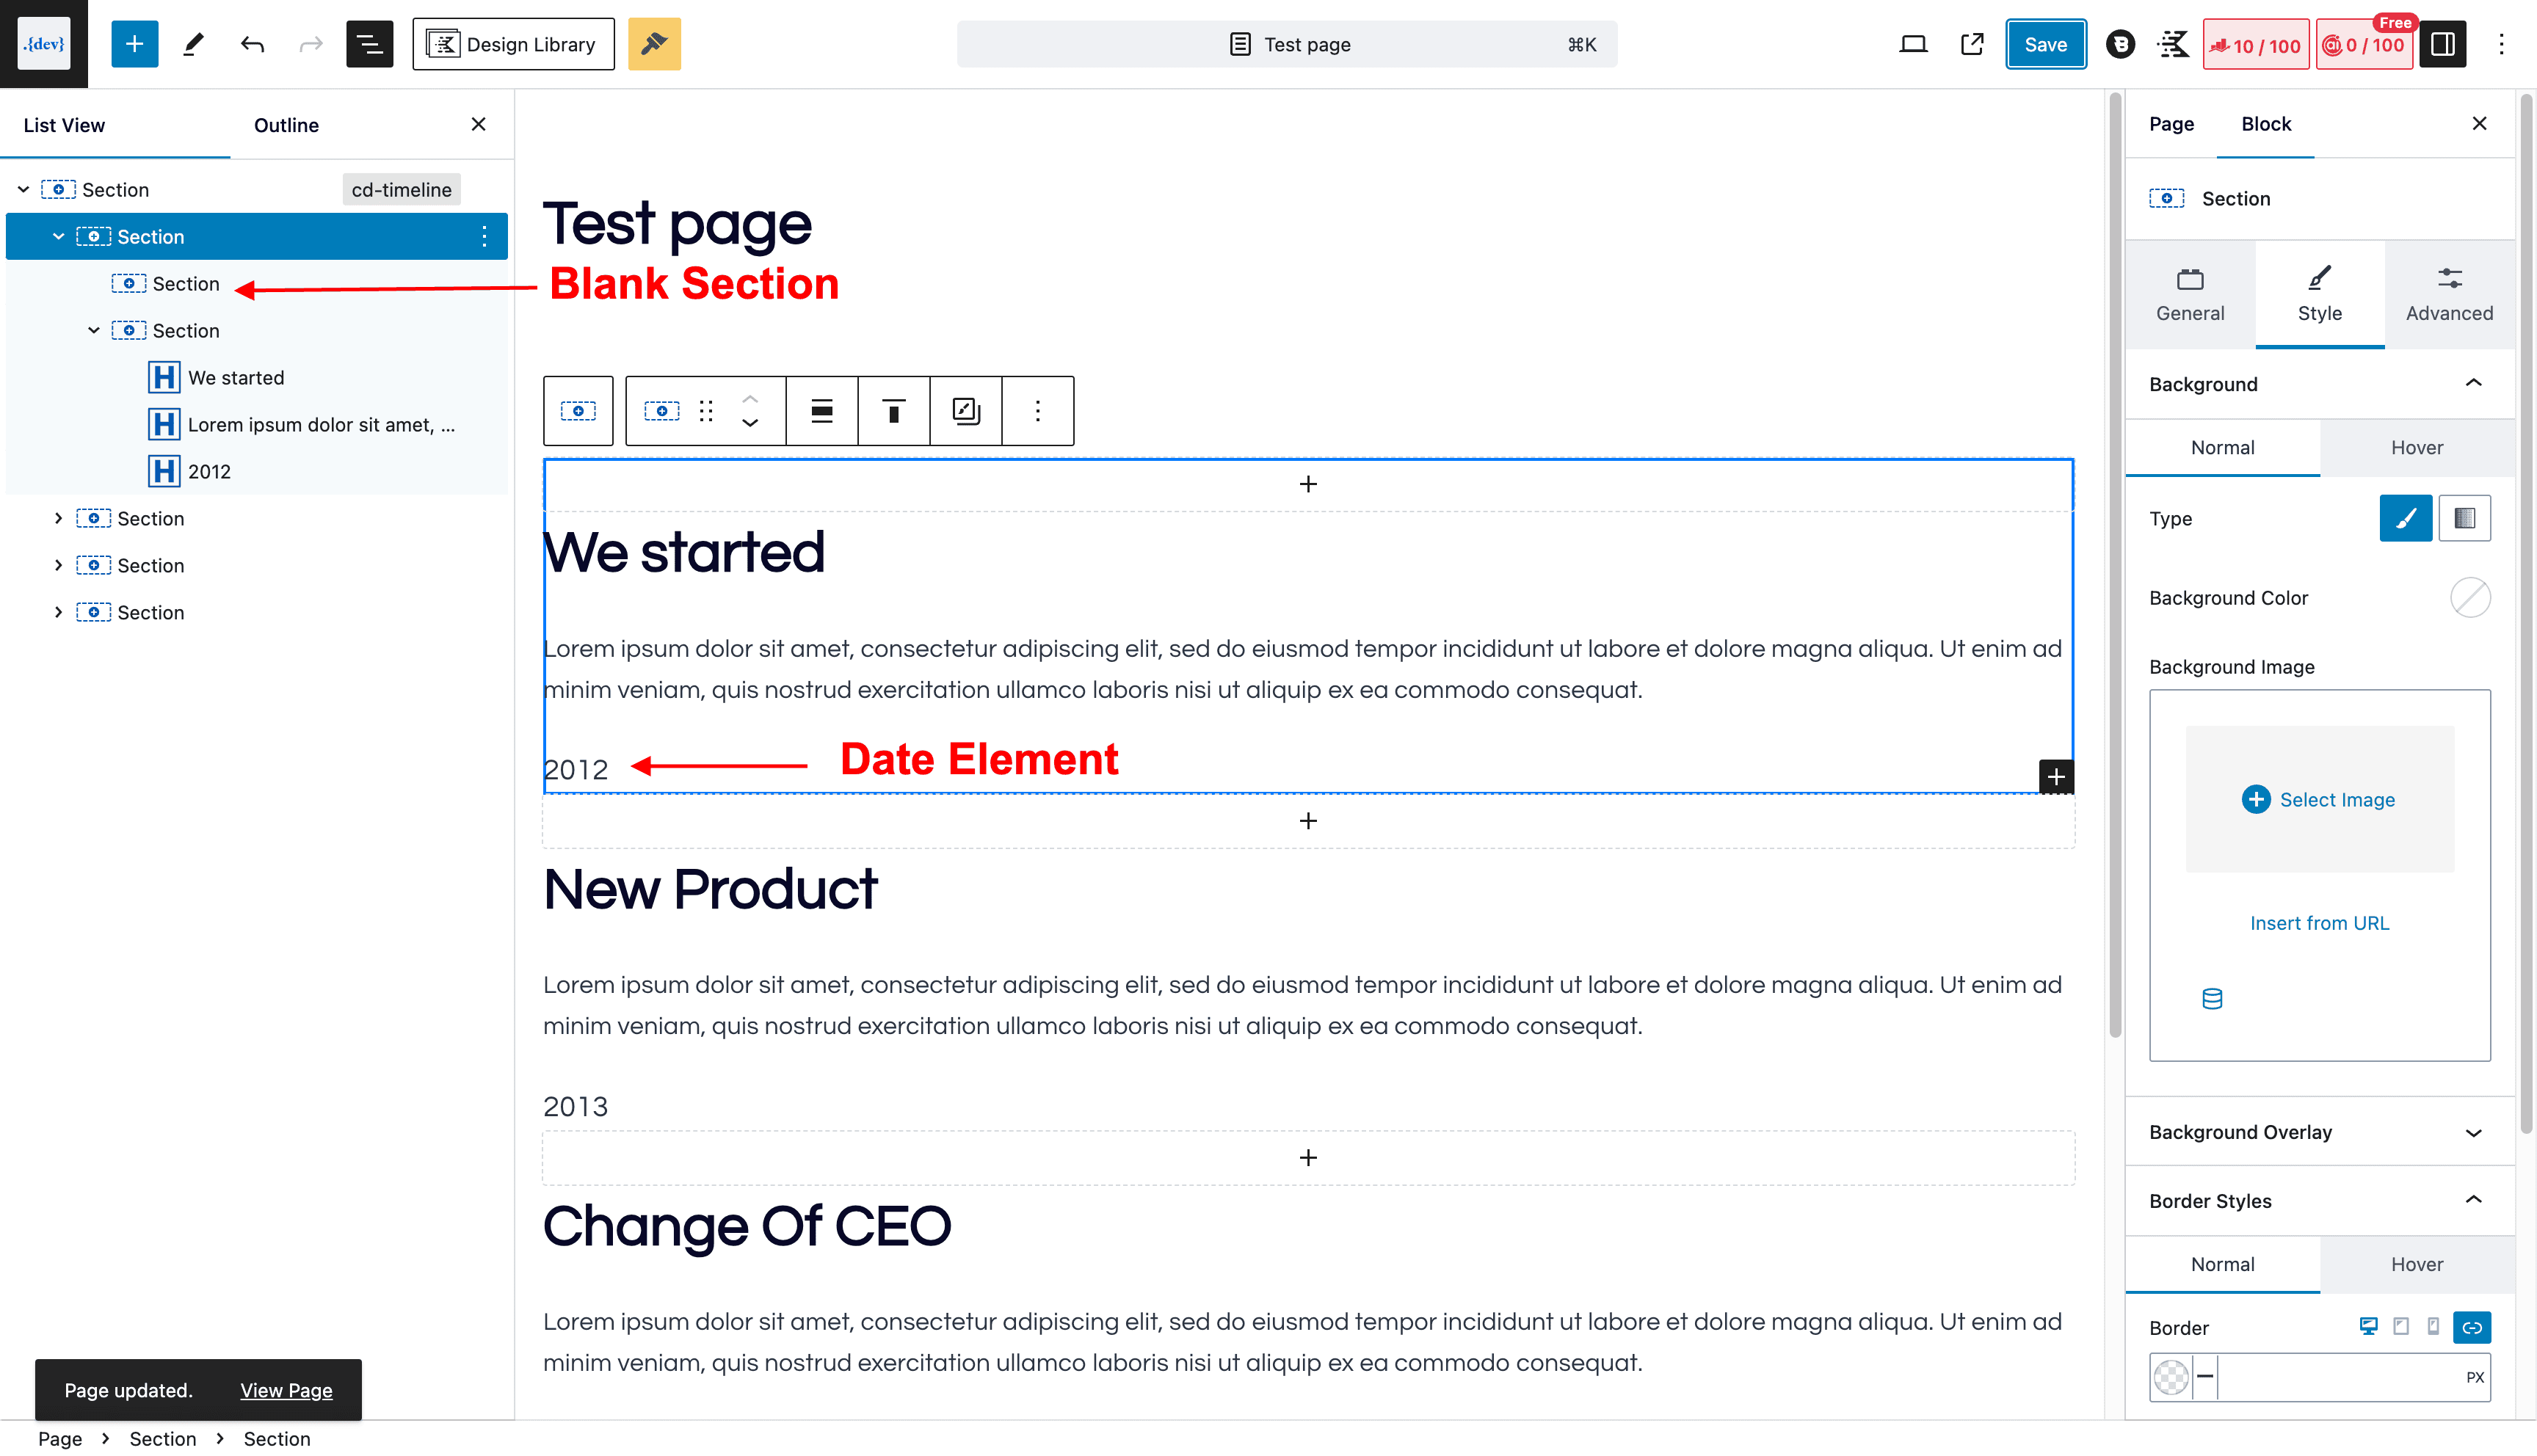
Follow these steps and create the first block for timeline and then just duplicate it and change content.
- Insert a Section and give it the ID – of “
cd-timeline” (Use HTML Anchor Field) and also add the class “cd-container“ - Insert a new Section inside the
cd-containersection and add the class “cd-timeline-block“, this will we the container for all your contents. - Insert a new Section inside the
cd-timeline-blocksection and add the class “cd-timeline-img“, This container will not have anything, it will be a blank container to create the circle element using border and bg colour. - Insert a new again Section inside the
cd-containersection and add the class “cd-timeline-content” to it, this will have all of your content like heading, para, date etc. - Finally, add everything inside this
cd-timeline-contentsection. - At last, use a heading Block with the class “
cd-date” this heading will be shown right after the circle as in image.
This is how your structure should look now
CSS for Timeline Block Style 1
Now you just need to add CSS which is given below, you will need to adjust some values given in the variable.
:root {
  --line-color: #2248EE; /* Color of the vertical line */
  --img-bg-color: #6683FF; /* Background color of timeline images */
  --box-bg-color: #f4f4f4; /* Background color of timeline content boxes */
  --box-border-radius: 2px; /* Border radius of timeline content boxes */
  --padding: 2em; /* Padding for timeline content */
  --arrow-size: 15px; /* Size of arrow triangle */
  --shadow-color: rgba(0, 0, 0, 0.05); /* Box shadow color */
  --small-shadow-color: rgba(0, 0, 0, 0.08); /* Inner shadow color */
  --timeline-img-size: 30px; /* Size of timeline images */
  --margin-large: 2em; /* Larger margin for timeline blocks */
  --margin-small: 1em; /* Smaller margin for timeline blocks */
}
.cd-container::after {
  content: '';
  display: table;
  clear: both;
}

/* --------------------------------
Main components
-------------------------------- */

#cd-timeline {
  position: relative;
  padding: var(--padding) 0;
  margin-top: var(--padding);
  margin-bottom: var(--padding);
}
#cd-timeline::before {
  content: '';
  position: absolute;
  top: 0;
  left: 25px;
  height: 100%;
  width: 4px;
  background: var(--line-color);
}
@media only screen and (min-width: 1170px) {
  #cd-timeline {
    margin-top: var(--margin-large);
    margin-bottom: var(--margin-large);
  }
  #cd-timeline::before {
    left: 50%;
    margin-left: -2px; /* Adjusting by half the line width */
  }

  /* Span Tag */
#cd-timeline .cd-timeline-block span{
	margin-top:-10px;

}
}

.cd-timeline-block {
  position: relative;
  margin: var(--margin-small) 0;
}
.cd-timeline-block:after {
  content: "";
  display: table;
  clear: both;
}
.cd-timeline-block:first-child {
  margin-top: 0;
}
.cd-timeline-block:last-child {
  margin-bottom: 0;
}
@media only screen and (min-width: 1170px) {
  .cd-timeline-block {
    margin: var(--margin-large) 0;
  }
}

.cd-timeline-img {
  position: absolute;
  top: 8px;
  left: 12px;
  width: var(--timeline-img-size);
  height: var(--timeline-img-size);
  border-radius: 50%;
  box-shadow: 0 0 0 4px var(--line-color), inset 0 2px 0 var(--small-shadow-color), 0 3px 0 4px var(--shadow-color);
  background: var(--img-bg-color);
}
@media only screen and (min-width: 1170px) {
  .cd-timeline-img {
    left: 50%;
    margin-left: calc(-1 * var(--timeline-img-size) / 2);
    margin-top: 15px;
  }
}

.cd-timeline-content {
  position: relative;
  margin-left: 60px;
  margin-right: 30px;
  background: var(--box-bg-color);
  border-radius: var(--box-border-radius);
  padding: var(--padding);
}

.cd-timeline-content:after {
  content: "";
  display: table;
  clear: both;
}

.cd-timeline-content .cd-date {
  display: inline-block;
}

/* Triangle for Odd (Left) Blocks */
.cd-timeline-content::before {
  content: '';
  position: absolute;
  top: 16px;
  right: 100%;
  height: 0;
  width: 0;
  border: var(--arrow-size) solid transparent;
  border-right: var(--arrow-size) solid var(--box-bg-color);
}

@media only screen and (min-width: 1170px) {
  .cd-timeline-content {
    margin-left: 0px;

    padding: 1.6em;
    width: 36%;
    margin: 0 5%;
  }

  .cd-timeline-block:nth-child(odd) .cd-timeline-content::before {
    top: 24px;
    left: 100%;
    right: auto;
    border-color: transparent;
    border-left-color: var(--box-bg-color);
  }

  .cd-timeline-block:nth-child(even) .cd-timeline-content::before {
    top: 25px;
    left: auto;
    right: 100%;
    border-color: transparent;
    border-right-color: var(--box-bg-color);
  }

  .cd-timeline-content .cd-date {
    position: absolute;
    width: 100%;
    left: 115%;
    top: 6px;
  }

  .cd-timeline-block:nth-child(even) .cd-timeline-content {
    float: right;
  }

  .cd-timeline-block:nth-child(even) .cd-timeline-content .cd-date {
    left: auto;
    right: 115%;
    text-align: right;
  }
}
/* 1170px and larger screen sizes */
@media only screen and (min-width: 1170px){

	/* Remove left margin for odd-numbered blocks */
	.cd-timeline-block:nth-child(odd) .cd-timeline-content{
		margin-left: 0;
		margin-right: 0;
	}

	/* Remove right margin for even-numbered blocks */
	.cd-timeline-block:nth-child(even) .cd-timeline-content{
		margin-left: 0;
		margin-right: 0;
	}

}

/* 1169px and smaller screen sizes */
@media (max-width:1169px){

	/* Block kadence column */
	#cd-timeline .cd-timeline-block .wp-block-kadence-column{
		left:12px;
	}

	.cd-timeline-block .cd-timeline-content{
		margin-right: 0;
	}

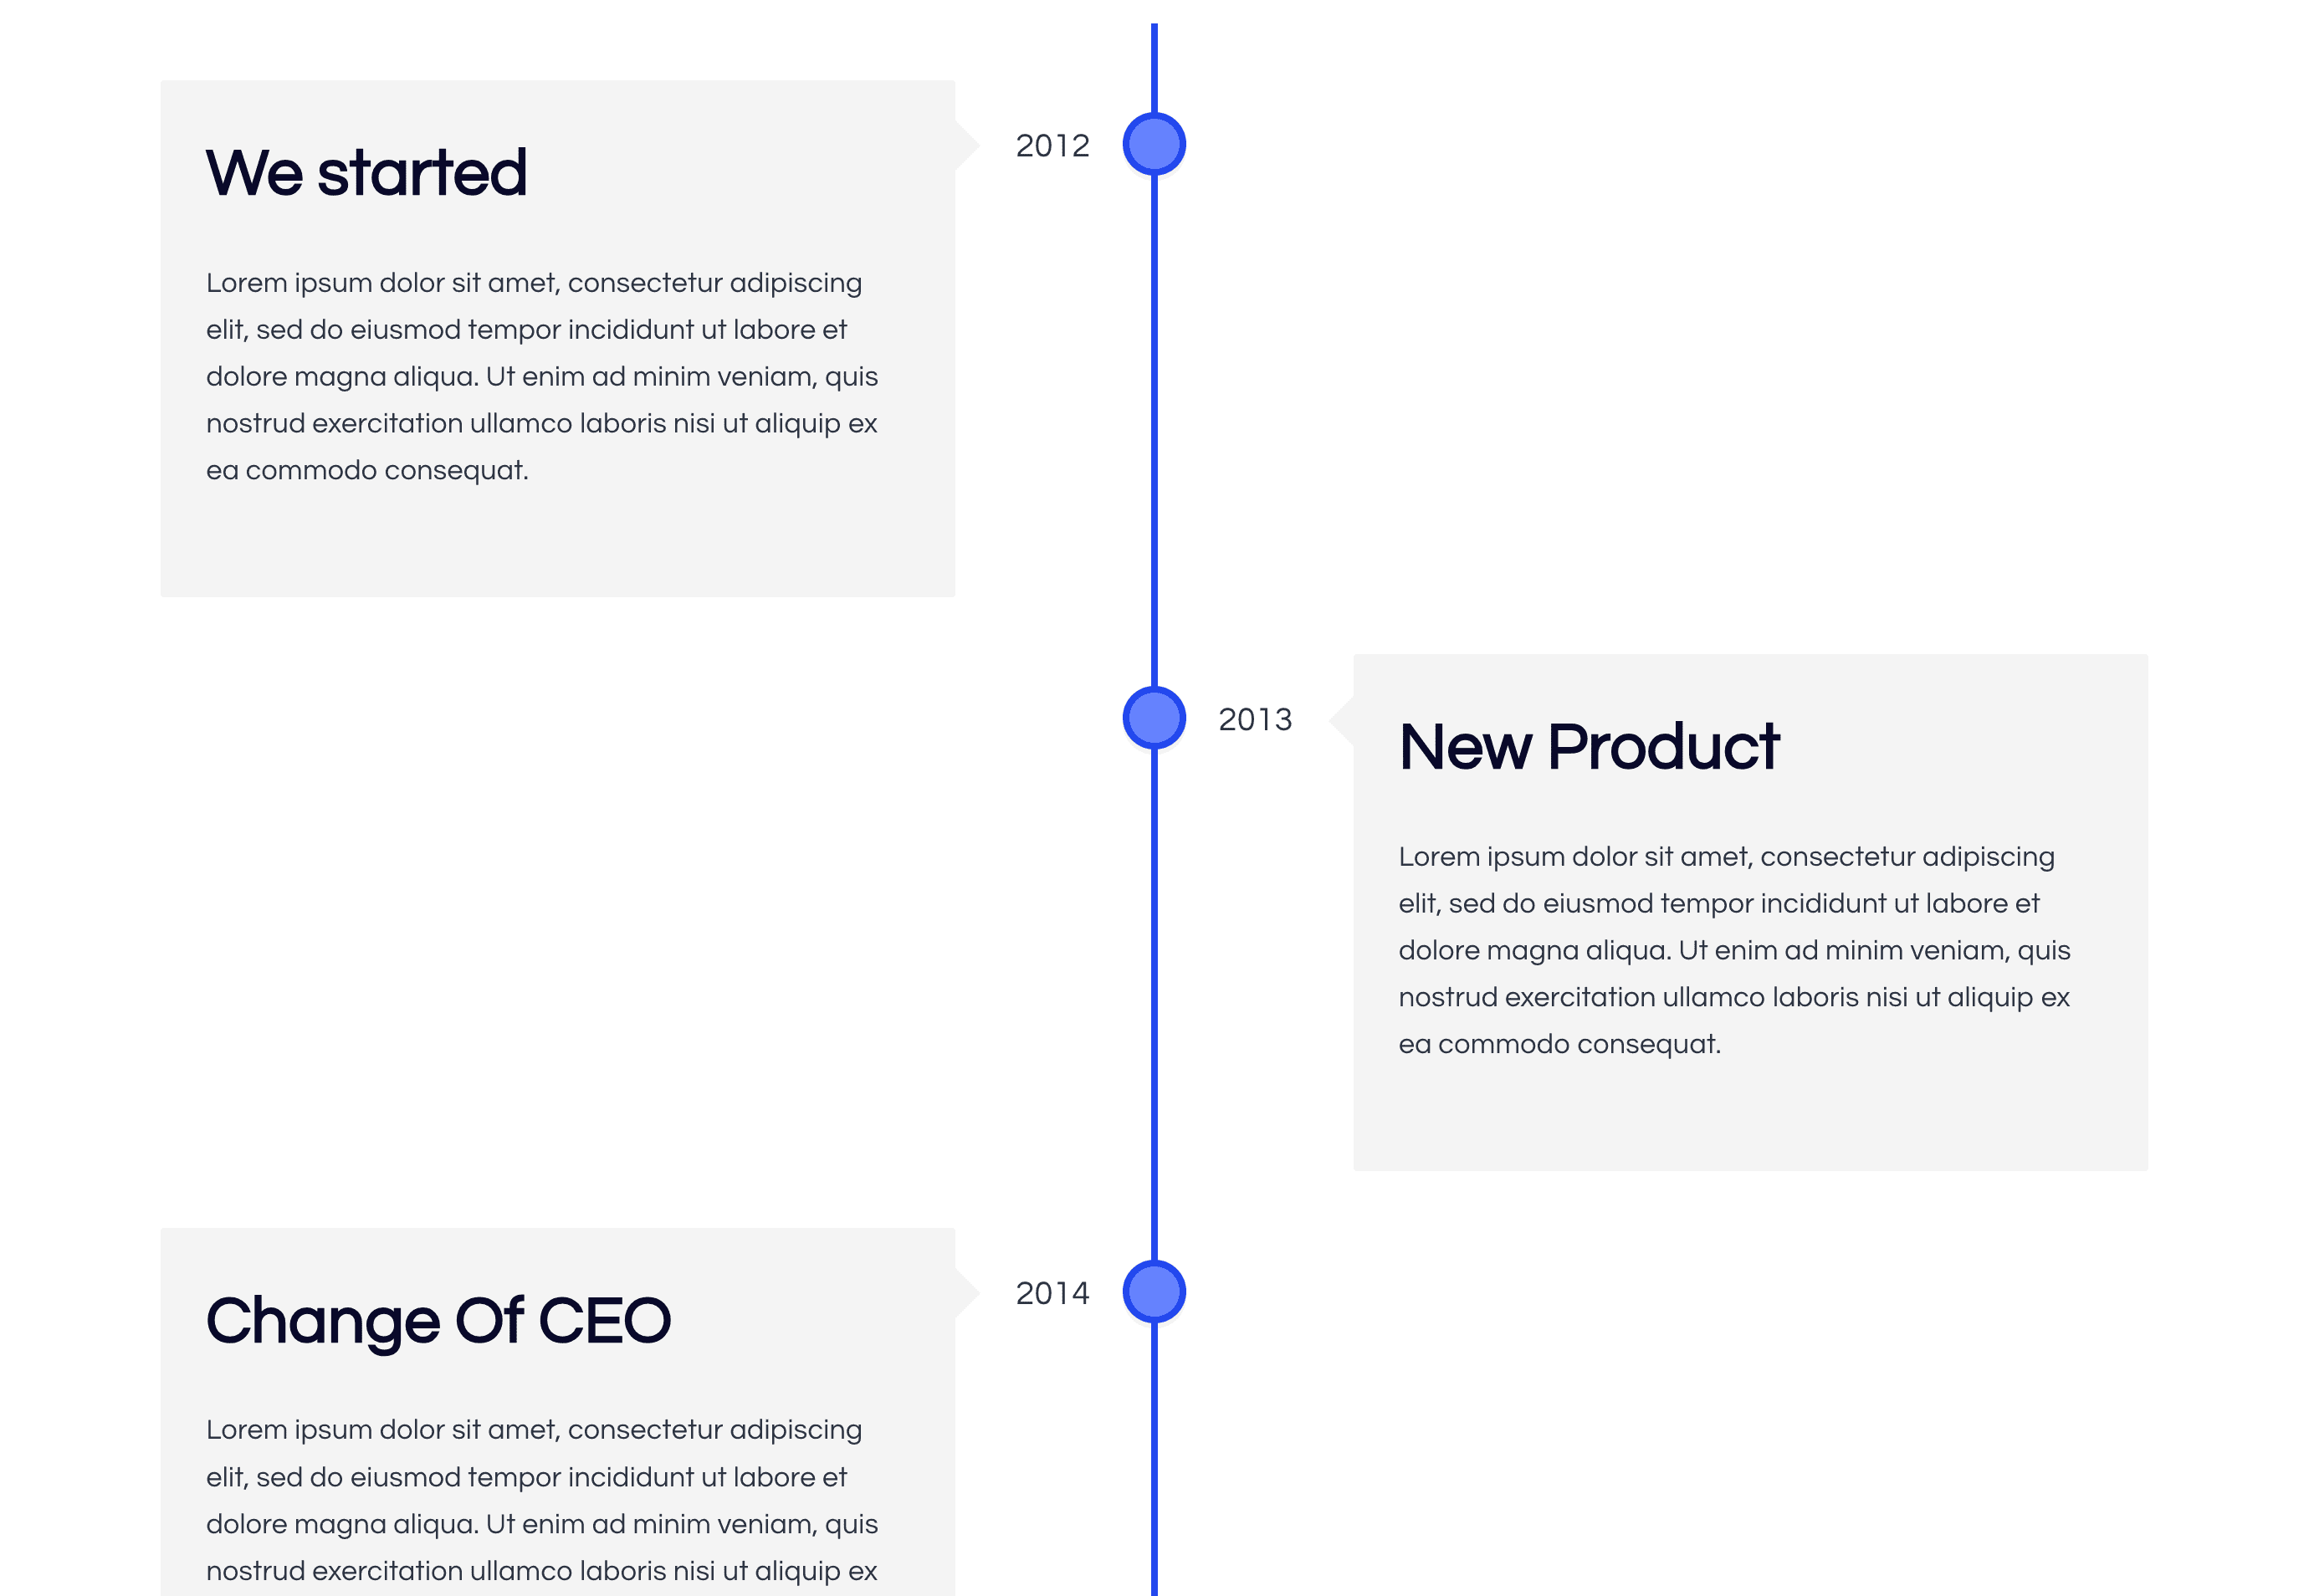
}Result After Adding CSS
Timeline Block Style 2
Style 2 is also quite similar to style 1 but it misses the Date element and has the ability to add different arrow colors with the same border.
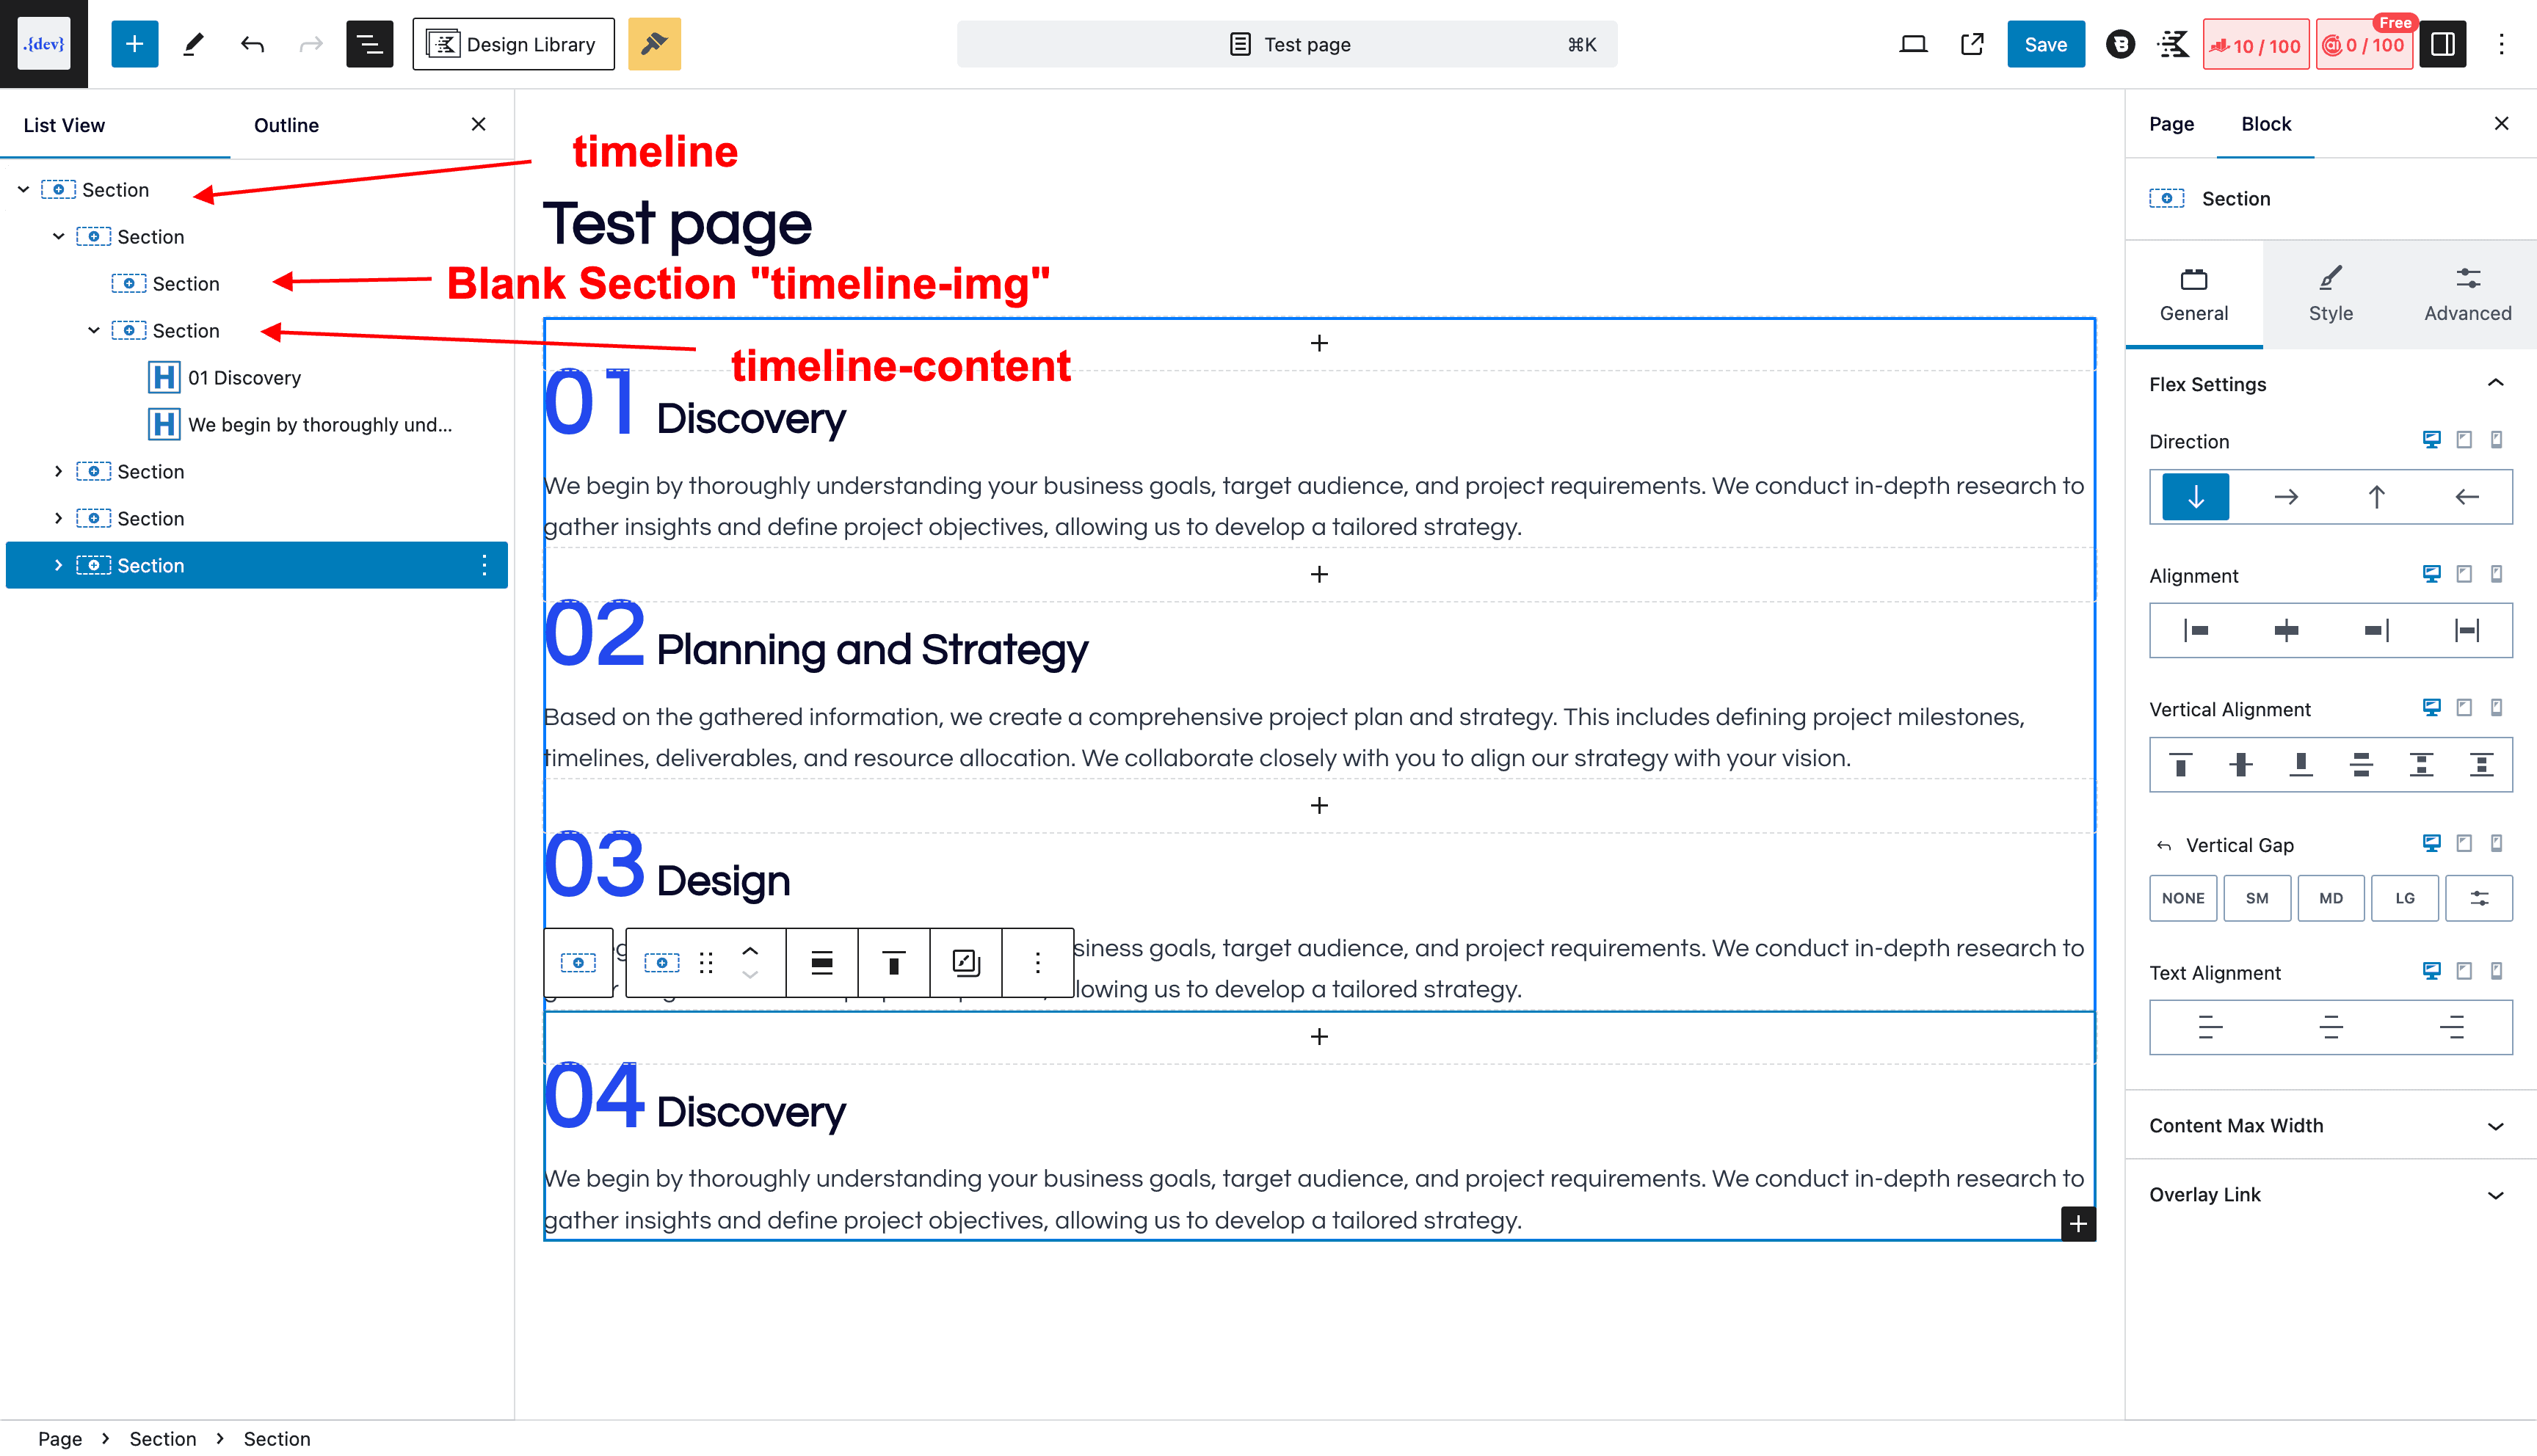
- Insert a Section and give it the the class “
timeline“ - Insert a new Section inside the
timelinesection and add the class “timeline-img“, This container will not have anything, it will be a blank container to create the circle element using border and bg colour. - Insert a new again Section inside the
timelinesection and add the class “timeline-content” to it, this will have all of your content like heading, para, date etc. - Finally, add everything inside this
timeline-contentsection.
Now your structure should look like this
CSS for Timeline Block Style 2
Now you just need to add CSS which is given below, you will need to adjust some values given in the variable.
:root {
	--line-color: #6683FF; /* Color of vertical line */
	--box-color: #f1f1f1; /* Color of box items */
	--arrow-color: #3858E9; /* Color of triangular arrow, same as box color */
	--dot-color: #2248EE; /* Color of circle dots on the line */
	--line-width: 4px; /* Thickness of vertical line */
	--dot-size: 25px; /* Size of circle dots */
	--box-width: 45%; /* Width of boxed item */
	--padding: 32px; /* Padding of boxed item */
	--arrow-size: 15px; /* Size of the arrow triangle */
	--margin-bottom: 10px; /* Bottom margin for timeline item */
	--border-radius: 8px; /* Border radius of boxed item */
	--shadow: 0 20px 25px -15px rgba(0, 0, 0, .2); /* Box shadow */
}

.timeline {
	position: relative;
	&::before {
		content: '';
		background: var(--line-color);
		width: var(--line-width);
		height: 95%;
		position: absolute;
		left: 50%;
		transform: translateX(-50%);
	}
}

.timeline-item {
	width: 100%;
	margin-bottom: var(--margin-bottom);

	&:nth-child(even) {
		.timeline-content {
			float: right;
			padding: 40px 30px 10px 30px;
			&::after {
				content: '';
				position: absolute;
				border-style: solid;
				width: 0;
				height: 0;
				top: 30px;
				left: -15px;
				border-width: 10px var(--arrow-size) 10px 0;
				border-color: transparent var(--arrow-color) transparent transparent;
			}
		}
	}

	&::after {
		content: '';
		display: block;
		clear: both;
	}
}

.timeline-content {
	position: relative;
	background: var(--box-color);
	border: solid 1px var(--arrow-color) ;
	width: var(--box-width);
	padding: var(--padding);
	border-radius: var(--border-radius);
	box-shadow: var(--shadow);

	&::after {
		content: '';
		position: absolute;
		border-style: solid;
		width: 0;
		height: 0;
		top: 30px;
		right: -15px;
		border-width: 10px 0 10px var(--arrow-size);
		border-color: transparent transparent transparent var(--arrow-color);
	}
}

.timeline-img {
	width: var(--dot-size);
	height: var(--dot-size);
	background: var(--dot-color);
	border-radius: 50%;
	position: absolute;
	left: 50%;
	margin-top: 25px;
	margin-left: calc(-1 * (var(--dot-size) / 2));
}

@media screen and (max-width: 768px) {

	.timeline {

		&::before {
			left: 15px;
		}

		.timeline-img {
			left: 15px;
		}

		.timeline-content {
			max-width: 100%;
			width: auto;
			margin-left: 70px;
		}

		.timeline-item {
margin-bottom: 20px ;
			&:nth-child(even) {
				.timeline-content {
					float: none;
				}
			}

			&:nth-child(odd) {
				.timeline-content {
					&::after {
						content: '';
						position: absolute;
						border-style: solid;
						width: 0;
						height: 0;
						top: 30px;
						left: -15px;
						border-width: 10px var(--arrow-size) 10px 0;
						border-color: transparent var(--arrow-color) transparent transparent;
					}
				}
			}
		}
	}
}
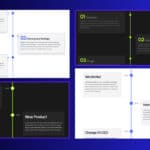
Result of Style 2 After Adding CSS
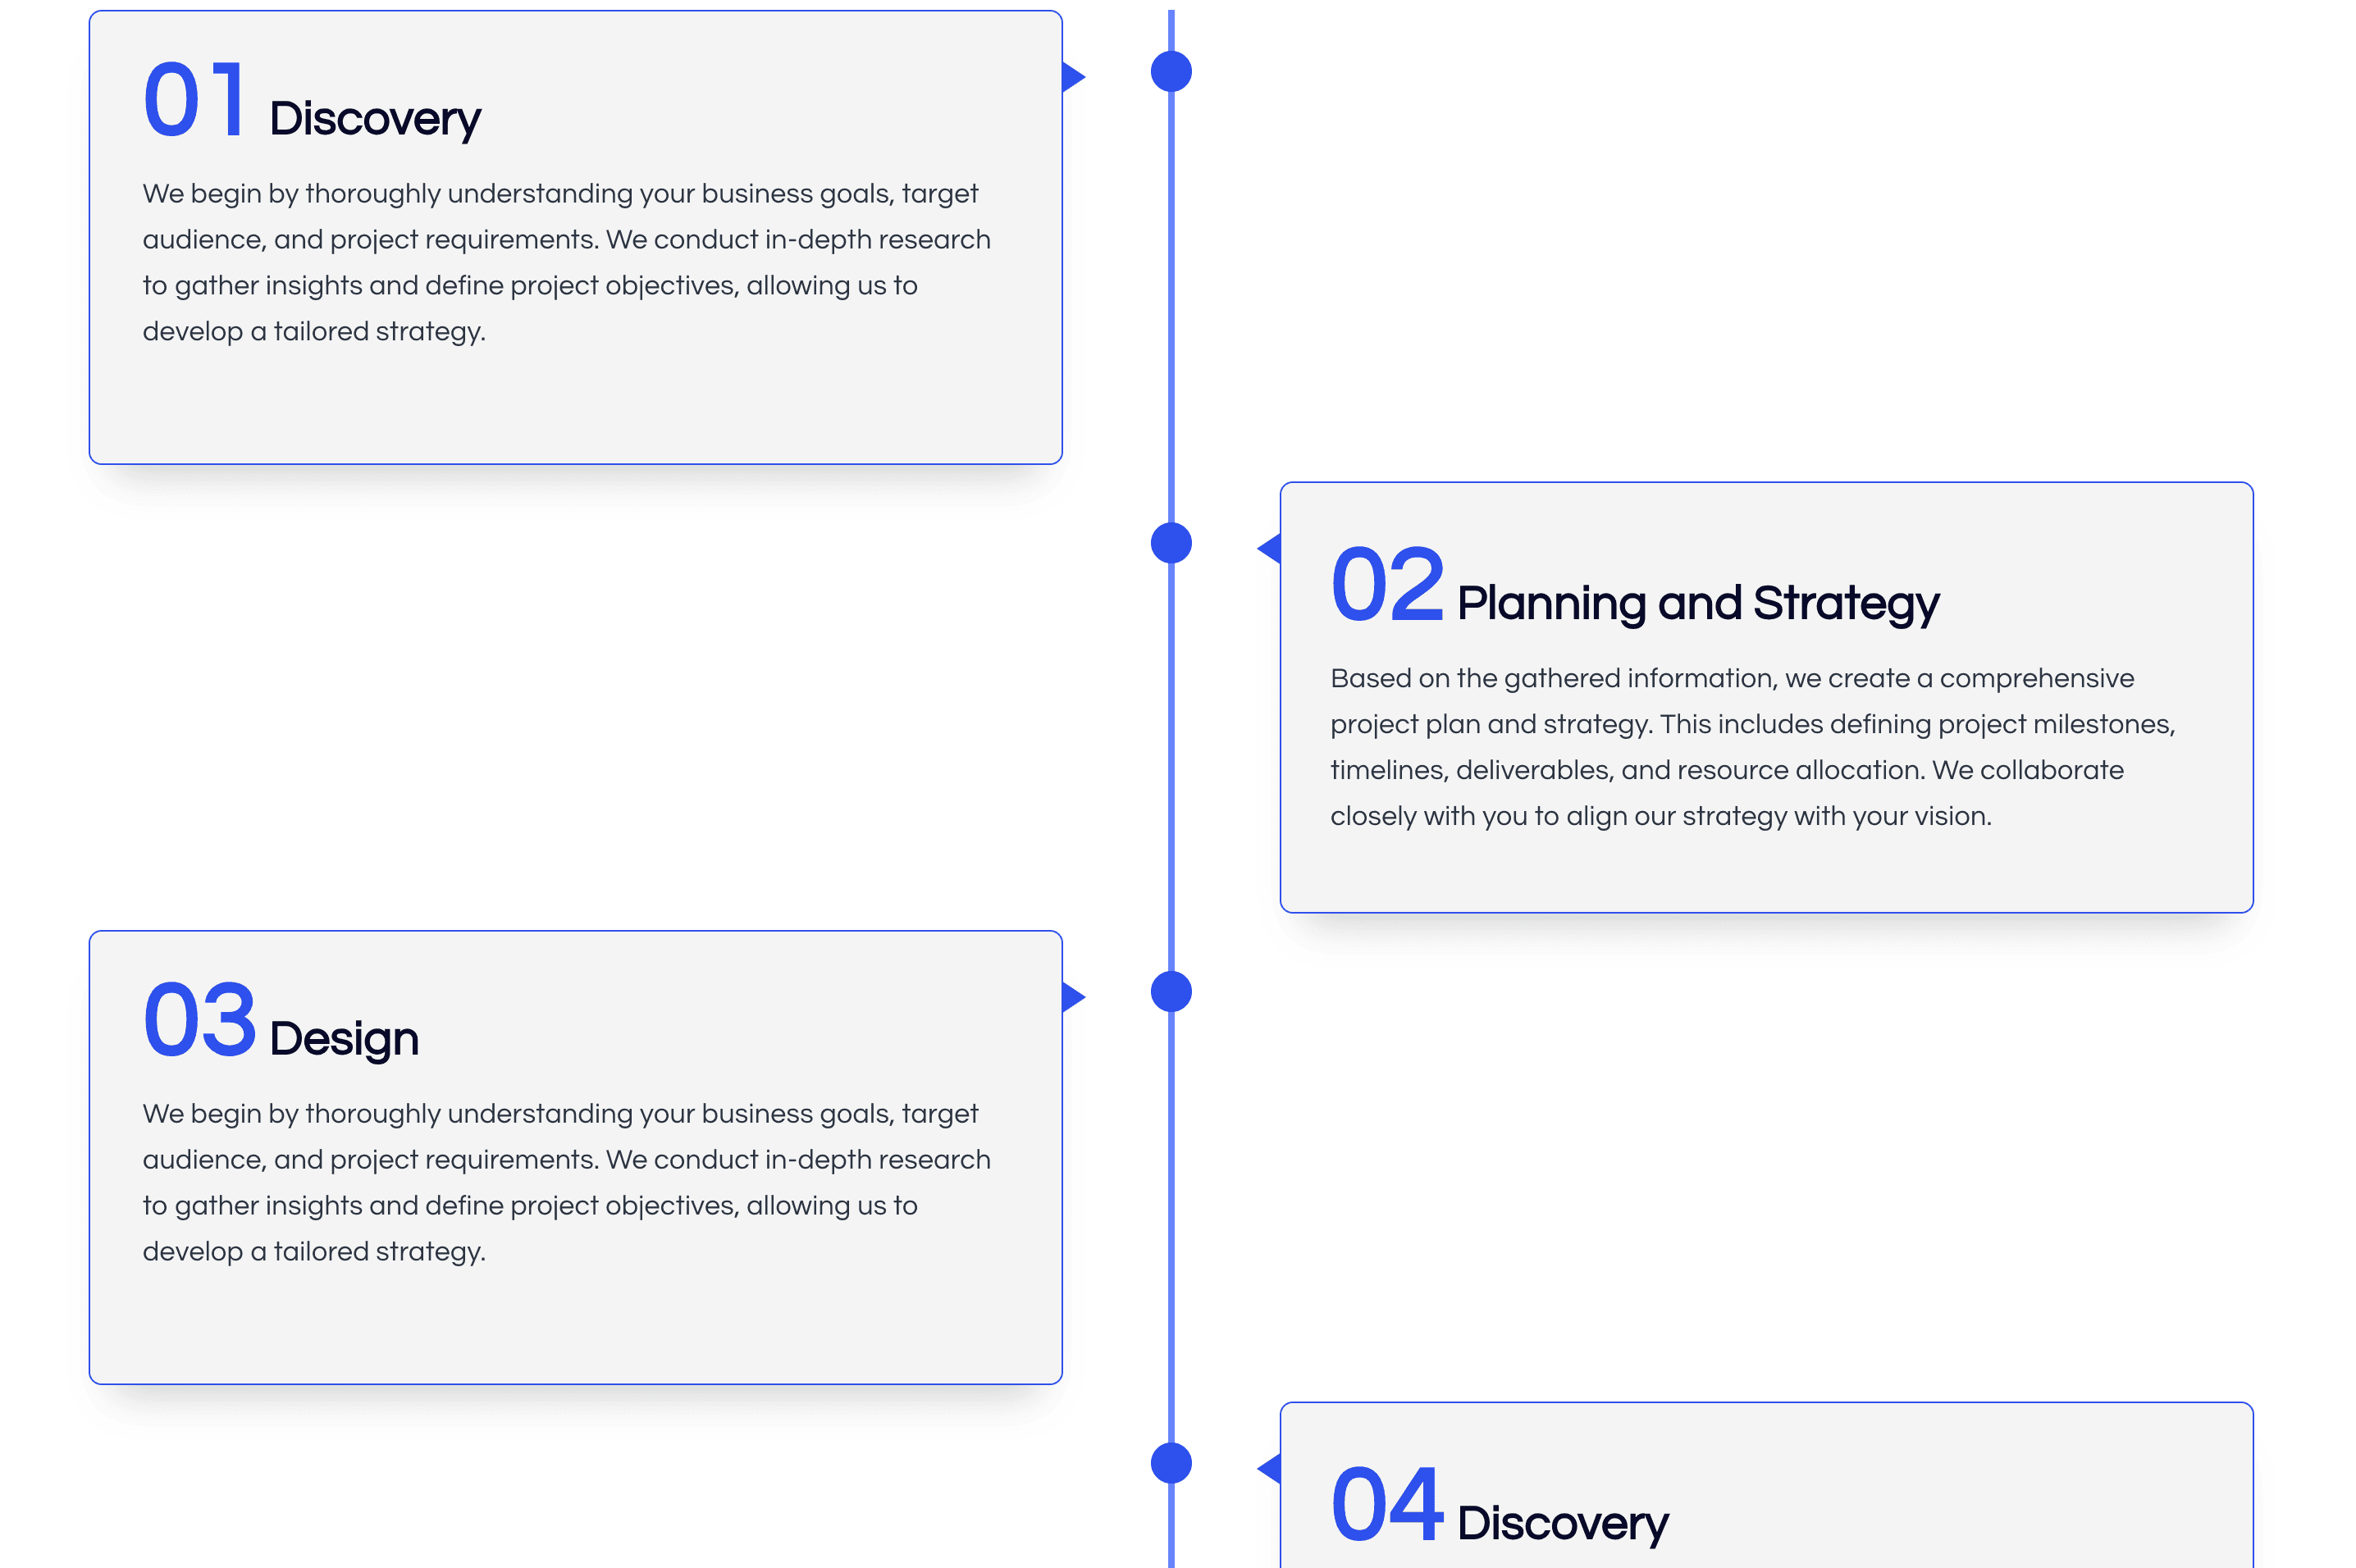
Note:- The Numbers that you see large and highlighted are done with the Kadence Heading Adv Highlight Feature.
Feel free to reach out to me if you need any help with it.


I was trying to implement Style 2, but faced issues with alignment. Could you please tell me how to resolve it?
Here is a screenshot: https://i.imgur.com/BtaM9rX.jpeg
I need to look into your code to understand the issue, it most proabbly is CSS issue, check classes added and selectors.